Some simple steps to replace the ankle catcher on the Tesla Model 3. This tutorial can help get your Tesla back on the road and save considerable amount of time and money. For more information on repair, service and troubleshooting for your Model 3, consider downloading our fully compressive, 5000+ page Tesla Model 3 workshop manual by clicking this link for more information ( TESLA MODEL 3 WORKSHOP MANUAL ) or clicking one of the buttons below.

Removal

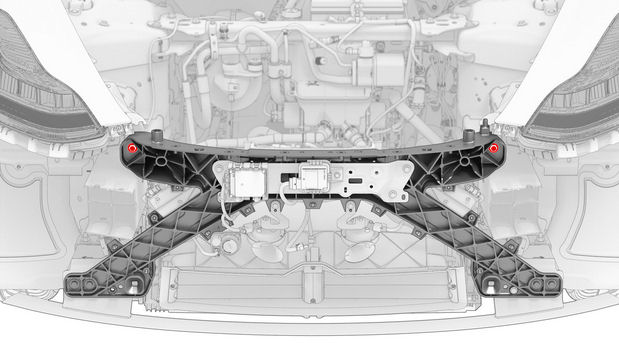
1 Remove the front fascia.
2 Remove the bolts that attach the bottom of the cooling fan module to the ankle catcher. Note: Lift the condenser fan module up to ease removal of the bolts.

3 Loosen but do not remove the bolts that attach the upper section of the front end carrier to the body.

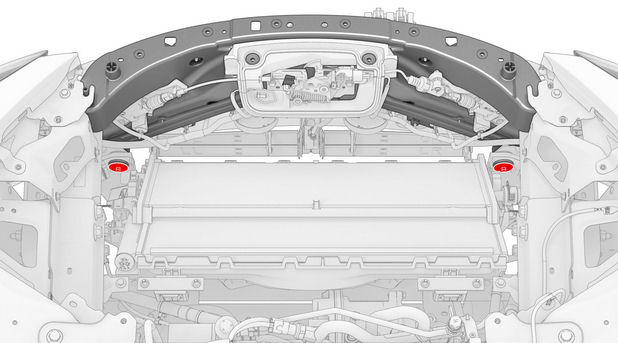
4 Remove the bolts that attach the front end carrier to the crash cans.

5 Move the front end carrier forward, slide the ankle catcher off the front end carrier locating posts, and then remove the ankle catcher from the vehicle.
Installation
1 Position the ankle carrier onto the front end carrier locating posts, and then slide the ankle catcher into place.

2 Hand-tighten the bolts that attach the front end carrier to the crash cans.

3 Torque the bolts that attach the front end carrier to the crash cans.
4 Tighten the bolts that attach the upper section of the front end carrier to the body

5 Install the bolts that attach the bottom of the cooling fan module to the ankle catcher.
Note : Lift the condenser fan module up to ease installation of the bolts

6 Install the front fascia.
Hopefully this step by step explanation for the removable and installation on the Tesla Model 3 ankle catcher was helpful. Again, consider downloading the full Tesla Model 3 workshop manual.

