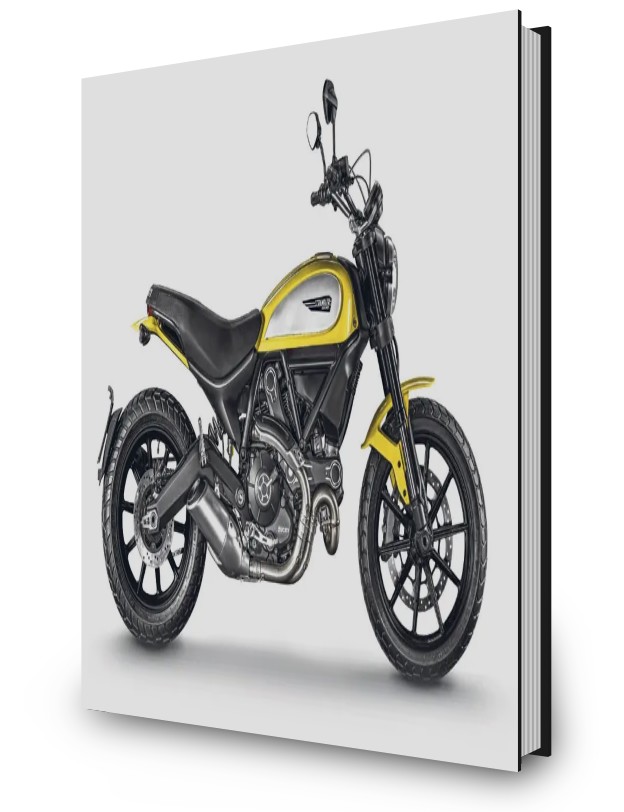
This Ducati Scrambler 800 workshop manual covers years 2015 onward’s. Once you download this Ducati Scrambler 800 workshop manual you will have access to 100’s of digital pages of technical know how, just one off payment will give you piece of mind knowing you will have answers to all Ducati Scrambler 800 problems, for life. These Ducati manuals are the same manuals the Ducati dealers use to repair your motorcycle. Consider downloading this manual and have access to data, photos, illustrations, technical know how, troubleshooting and repair tips to help you out with any Scrambler 800 issue.
Why download this Ducati Scrambler 800 Workshop eManual?
- The cost of living is sky rocketing and repairing and maintain our vehicles is getting to expensive : By downloading one of our eManuals it can save a huge amount of money by giving the repair or service ago yourself.
- The sense of achievement that comes along with any DIY project.
- eManuals opposed to printed manuals have less impact on the environment, this is mainly due to less printing and shipping. Only print what you need and download instantly.
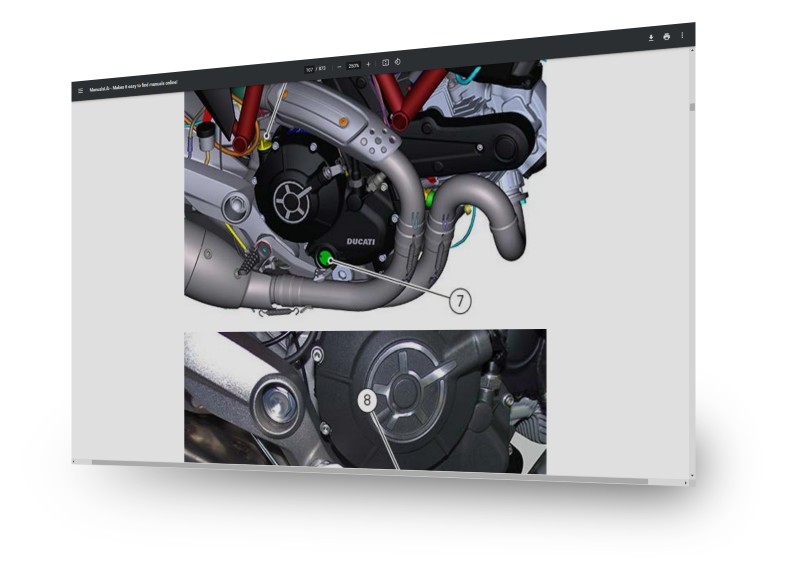
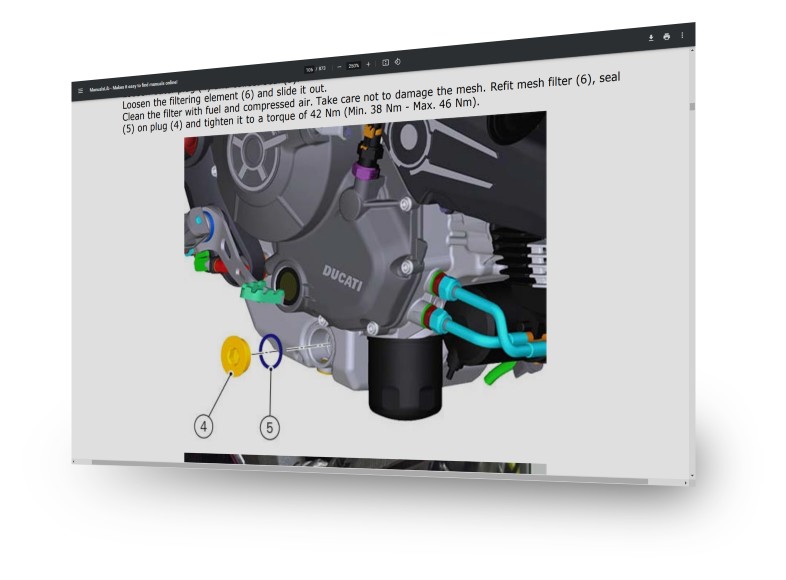
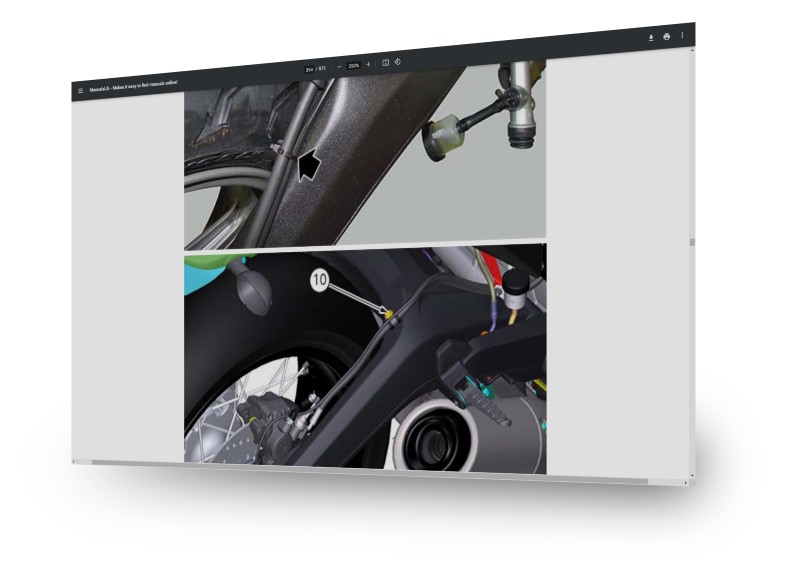
What Should I Expect When I Download The Scrambler 800 Workshop Manual ?
Our manual cover near every possible area of repair, service or repair on your motorcycle, although these manuals are used within Ducati aid their mechanics with repairs, they are simple step by step instructions on how to get your motorcycle back on the road.
- General
- Symbols – Abbreviations – References
- Product specifications
- Dangerous products – warnings
- General maintenance instructions
- General safety rules
- Model-specific information
- Model identification
- Identification data
- Technical data
- Technical specifications
- Lights/instrument panel
- Injection system
- Fuel system
- Injection-ignition system
- Charging system/generator
- Hydraulic brakes
- Rear suspension
- Rear wheel
- Front suspension
- Front wheel
- Cooling system
- Gearbox
- Cylinder/piston
- Crankshaft
- Timing system/valves
- Transmission
- Colours
- General
- Overall dimensions
- Overall dimensions
- Fuel, lubricants and other fluids
- Fuel, lubricants and other fluids
- Tightening torque settings
- Engine tightening torque values
- Frame tightening torque values
- Service tools
- Diagnosis special tools
- Frame special tools
- Engine special tools
- Maintenance operations
- Vehicle pre-delivery
- Scheduled maintenance chart
- Operations to be carried out by the customer
- Operations to be carried out by the dealer
- Maintenance operations
- Adjusting the rear shock absorber
- Adjusting the position of the gearchange pedal and rear brake pedal
- Adjusting the front brake control lever
- Adjusting the throttle cable
- Checking rear brake pad wear and replacing brake pads
- Checking front brake pad wear and replacing brake pads
- Adjusting the chain tension
- Adjusting the steering head bearing play
- Downloaded from www.Manualslib.com manuals search engine
- Clutch control cable adjustment
- Changing the fluid in the rear brake system
- Changing the fluid in the front brake system
- Changing and cleaning the air filters
- Replacing the spark plugs
- Changing the timing belts
- Checking valve clearance
- Changing the engine oil and filter cartridge
- Check engine oil level
- Fairings
- Rear-view mirrors
- Refitting the rear-view mirrors
- Removing the rear-view mirrors
- Seat – tail guard – side body panels
- Refitting the tail guard (CLASSIC)
- Removing the tail guard (CLASSIC)
- Refitting the seat release mechanism
- Removing the seat release mechanism
- Refitting the tail guard
- Removing the tail guard
- Refitting the rear side body panels
- Removing the rear side body panels
- Refitting the seat
- Removing the seat
- Mudguard
- Refitting the front mudguard (URBAN ENDURO)
- Removing the front mudguard (URBAN ENDURO)
- Refitting the front mudguard
- Removing the front mudguard
- Belly pan
- Refitting the belly pan (URBAN ENDURO)
- Removing the belly pan (URBAN ENDURO)
- Electric system and engine management
- Wiring diagram
- Routing of wiring on frame
- Fuse box key
- Wiring diagram cable colour codes
- Key to wiring diagram
- Downloaded from www.Manualslib.com manuals search engine
- Charge system – Battery
- Rectifier-regulator
- Alternator
- Battery
- Topping up the electrolyte
- Recharging the battery
- Checking the battery charging system
- Electric starter
- Solenoid starter
- Starter motor
- Electric starting system
- Lighting
- Aligning the headlight
- Changing bulbs
- Instrument panel
- Entering PIN CODE function for overriding purposes
- Key duplication
- Operation
- Keys
- Immobilizer system
- Light control
- Setting the units of measurement
- Changing the PIN CODE
- Pin Code
- Clock setting function (CLOCK)
- Instrument panel back-lighting setting (B.LIGHT)
- Battery voltage
- ABS control unit enabling/disabling
- Setting menu
- DESMO SERVICE indication
- DESMO SERVICE countdown indication
- OIL SERVICE zero warning
- Service indication (SERVICE)
- High engine temperature
- Clock
- Displayed errors description
- Error warnings
- Errors
- Ambient air temperature (AIR)
- Partial fuel reserve counter (TRIP FUEL)
- Odometer (TOT)
- Engine rpm indication (RPM)
- Motorcycle speed
- Main functions
- Parameter setting/displaying
- Function buttons
- Technological Dictionary
- Acronyms and abbreviations used in the Manual
- Instrument panel
- System components
- Diagnostic socket
- Main relay and injection
- Timing/rpm sensor
- Throttle position potentiometer
- Coil
- Ignition spark plug
- Temperature sensor
- Air pressure sensor
- Lambda sensor
- Stepper motor
- Electric injector
- Electronic control unit
- Chassis
- Front wheel
- Overhauling the front wheel
- Overhauling the front wheel
- Refitting the front wheel
- Overhauling the front wheel
- Removing the front wheel
- Rear wheel
- Overhauling the rear wheel
- Overhauling the rear wheel
- Refitting the rear wheel
- Overhauling the rear wheel
- Removing the rear wheel
- Front brake control
- Refitting the front brake system
- Refitting the brake disc
- Overhauling the front brake components
- Removing the brake disc
- Removing the front brake system
- Maintenance operations
- Refitting the front brake master cylinder
- Removing the front brake master cylinder
- Rear brake
- Refitting the rear brake disc
- Removing the rear brake disc
- Refitting the rear brake calliper
- Removing the rear brake calliper
- Refitting the rear brake control
- Disassembling the rear brake control
- Removing the rear brake control
- ABS system information
- ABS system deactivation
- ABS system operation information
- Operating principle
- ABS system components
- Routing wiring harnesses/hoses
- Refitting the ABS control unit
- Removing the ABS control unit
- Changing the rear phonic wheel sensor
- Changing the front phonic wheel sensor
- ABS component maintenance
- Bleeding of the ABS hydraulic system
- Adjusting the AIR-GAP of phonic wheel sensor
- Handlebar assembly: throttle control
- Refitting the throttle control
- Removing the throttle control
- Adjusting the throttle cable
- Refitting the handlebar
- Removing the handlebar
- Handlebar assembly: clutch control
- Refitting the clutch assembly
- Removing the clutch assembly
- Handlebar assembly: ignition switch
- Refitting the ignition switch
- Removing the ignition switch
- Gear selector control
- Refitting the gear change control
- Disassembling the gear change control
- Removing the gear change control
- Fork – steering head: front fork
- Refitting the front fork
- Overhauling the front fork
- Removing the front fork
- Fork – steering head: steering assembly
- Refitting the steering tube components
- Removing the steering tube components
- Steering angle adjustment
- Adjusting the steering head bearing clearance
- Rear shock absorber assembly
- Refitting the rear suspension
- Overhauling the rear shock absorber
- Removing the rear shock absorber
- Rear suspension system
- Swinging arm
- Refitting the rear swinging arm
- Overhauling the rear swinging arm
- Inspecting the swinging arm shaft
- Removing the swinging arm
- Final drive
- Lubricating the chain
- Washing the chain
- Refitting the rear sprocket
- Removing the rear sprocket
- Refitting the front sprocket
- Removing the front sprocket
- Inspection of the final drive
- Footrest support
- Refitting the rear footpegs
- Removing the rear footpegs
- Refitting the front footpeg support
- Removing the front footpeg support
- Refitting the front footpegs
- Removing the front footpegs
- Stands
- Refitting the side stand
- Removing the side stand
- Inspecting the frame
- Checking the frame
- Refitting the structural parts and frame
- Removing structural components and frame
- Tail light – number plate holder
- Rimontaggio fanale posteriore
- Smontaggio fanale posteriore
- Refitting the number plate holder
- Removing the number plate holder
- Electrical components compartment
- Refitting the electric components compartment
- Removing the electric components compartment
- Fuel/Exhaust system
- Fuel tank
- Refitting the fuel tank
- Refitting the fuel tank flange
- Removing the fuel tank flange
- Refitting the tank filler plug
- Removing the tank filler plug
- Removing the fuel tank
- Airbox – throttle body
- Refitting the throttle body
- Removing the throttle body
- Refitting the airbox
- Removing the airbox
- Air intake
- Removing the secondary air system
- Refitting the air filters
- Removing the air filters
- Exhaust system
- Refitting the silencer (FULL THROTTLE)
- Removing the silencer (FULL THROTTLE)
- Refitting the exhaust system
- Removing the exhaust system
- Refitting the silencer
- Removing the silencer
- Canister filter
- Refitting the Canister filter
- Removing the canister filter
- Canister filter system
- Engine
- Removing – refitting the complete engine
- Refitting the engine
- Removing the engine
- Lubrication system: oil pump
- Refitting the oil pump
- Reassembling the oil pump
- Disassembling the oil pump gear
- Removing the oil pump
- Lubrication system: oil cooler
- Refitting the lubrication system
- Inspecting the oil cooler
- Removing the lubrication system
- Cylinder head assembly: checks and adjustments
- Checking the engine timing
- Checking valve lift
- Checking and adjusting the valve clearance
- Cylinder head assembly: timing system
- Refitting the timing outer covers
- Refitting the timing belts
- Refitting the cylinder heads pulleys/idler pulleys
- Reassembling the timing pulleys
- Refitting the timing layshaft pulley
- Removing the timing layshaft pulleys
- Disassembling the camshaft pulleys
- Removing the cylinder head pulley/fixed tensioner
- Removing the mobile tensioner/timing belt
- Removing the timing belt covers
- Cylinder head assembly: camshafts
- Refitting the intake manifold
- Removing the intake manifold
- Refitting the camshafts
- Check of the camshafts and supports
- Removing the camshafts
- Cylinder head assembly: valves – rocker arms
- Refitting the cylinder heads
- Refitting the valves and rocker arms
- Overhauling the cylinder head components
- Removing the valves and rocker arms
- Removing the cylinder heads
- Cylinder/piston assembly
- Refitting the cylinder/piston assembly
- Overhauling the cylinder/piston components
- Removing the cylinder/piston assembly
- Clutch assembly: clutch
- Refitting the clutch
- Checking and overhauling the components
- Removing the clutch
- Description of the clutch assembly
- Clutch assembly: clutch cover
- Refitting the clutch cover
- Reassembling the clutch cover
- Disassembling the clutch cover
- Removing the clutch cover
- Clutch assembly: primary drive gears
- Refitting the primary drive gears and checking backlash
- Removing the primary drive gears
- Gearbox assembly: linkages
- Refitting the gearchange mechanism
- Refitting the gear interlock plunger and ratchet
- Disassembling gear interlock plunger and ratchet
- Removing the gearchange mechanism
- Gearbox assembly: gearbox shafts
- Reassembling the gearbox assembly
- Reassembling the gearbox shafts
- Inspecting the fork selector drum
- Inspecting the gear selector forks
- Overhauling the gearbox
- Disassembling the gearbox shafts
- Removing the gearbox assembly
- Flywheel – generator
- Refitting the flywheel/generator assembly
- Overhauling the flywheel/generator assembly
- Removing the flywheel/generator assembly
- Refitting the generator cover
- Reassembling the generator cover
- Disassembling the generator cover
- Removing the generator cover
- Crankcase: external components
- Refitting the starter motor
- Removing the starter motor
- Refitting the starter motor idler gear
- Removing the starter motor idler gear
- Refitting the timing gears
- Removing the timing gears
- Refitting the external components
- Removing outer components
- Crankcase: casings
- Closing the crankcase
- Shimming the shafts
- Reassembling the crankcase halves
- Main bearings
- Overhauling the crankcase halves
- Separating the crankcase halves
- Crankcase: connecting rod assembly
- Reassembling the connecting rod assembly
- Overhauling the connecting rod assembly
- Disassembling the connecting rod assembly
- Removing the connecting rod assembly
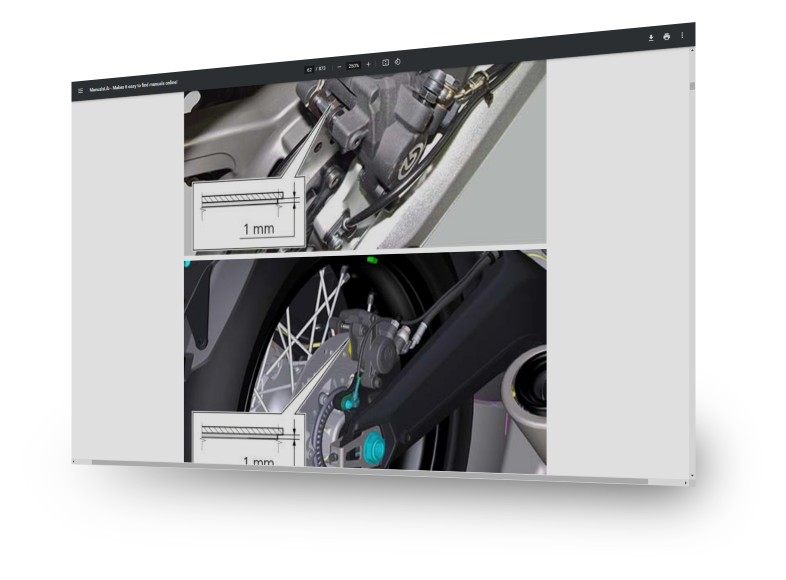
FORMAT: PDF
LANGUAGE: English
PRINTABLE : Yes
PAGES : 870+
MODELS : Scrambler 800
YEARS : 2015 onwards
COMPATIBLE: All Operating Systems
Therefor by downloading this Ducati Scrambler 800 workshop Manual you will be able to save a considerable amount of time and above all money. In conclusion, by simply downloading this workshop manual you can have access to in depth know how, subsequently it will aid you in getting your Scrambler 800 back in working order, hundreds of detailed pages will take you through a step by step process to resolve near all Ducati motorcycle problems.
Furthermore there is no need to wait for a CD or a hardcover manual to come through the mail, just click the below link and the full official Ducati workshop manual will be available to you via your email inbox. Moreover, if you are looking for another make or model of car or motorcycle, please email us via our contacts page, or contact us via our social media channels.
