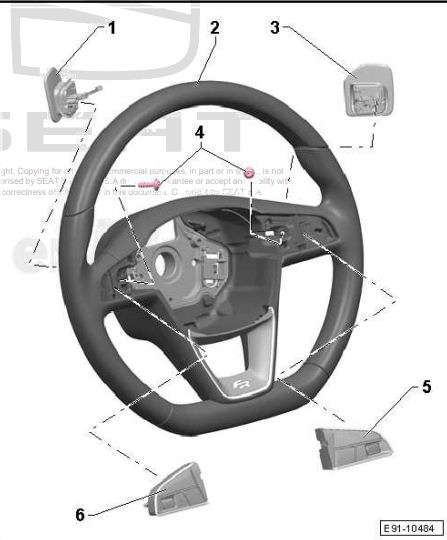
This simple guide and diagram(s) explains how to remove and install the Seat Leon multifunctional steering wheel. For more guides like this please consider downloading our Seat Leon workshop manual from this link ( SEAT LEON WORKSHOP MANUAL ), or download it directly from the download buttons below.
Overview

- Tiptronic switch in steering wheel to shift down
- 3-spoke steering wheel
- Tiptronic switch in steering wheel to shift up
- Screw
- Multifunction buttons on right in steering wheel
- Multifunction buttons on left in steering wheel
Removing and installing steering wheel multifunction buttons


- Switch off ignition and all electrical equipment.
Vehicles without access and start authorisation system - Remove ignition key, if fitted.
Vehicles with access and start authorisation system - Store ignition key outside the vehicle to prevent the ignition from being switched on unintentionally.
- Remove driver airbag.
- Take connecting wires out of their guides in steering wheel.
- Clip out the multi-function buttons -1- with the wedge – as shown in the figure.
- At the same time, pay attention to connectors leading to Tip‐tronic switches -2-.
- Release and detach the plug connectors of the multi-function buttons.
Installation
- Installation is carried out in the reverse sequence.
- Ensure connecting wiring -2- for Tiptronic switches is routed as shown in illustration.
- Route remaining connecting wiring, including connectors, through guides in steering wheel.
- Finally, check again that wiring in steering wheel is correctly routed.
