This article is simple description and how to guide of the Hyundai Tucson MAFS Mass Air Flow Sensor. All information comes direction from our downloadable PDF Hyundai Tucson workshop manual, if you are interested in servicing, repairing or troubleshooting your Hyundai Tucson, consider downloading this fully comprehensive workshop manual by following this link ( Hyundai Tucson Workshop Manual ) or clicking the download button below.
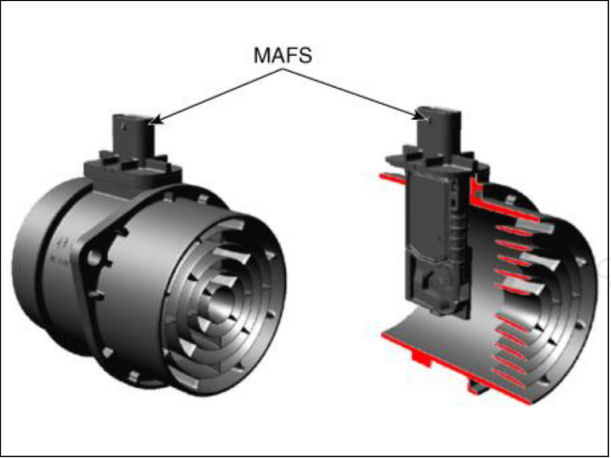
MAFS Mass Air Flow Sensor Description
MAFS uses a hot-film type element to measure the mass of intake air entering the engine, and send the signal to ECM. A large amount of intake air represents acceleration or high load conditions while a small amount of intake air represents declaration or idle.
The ECM used this information to control the EGR solenoid value and current the fuel amount.
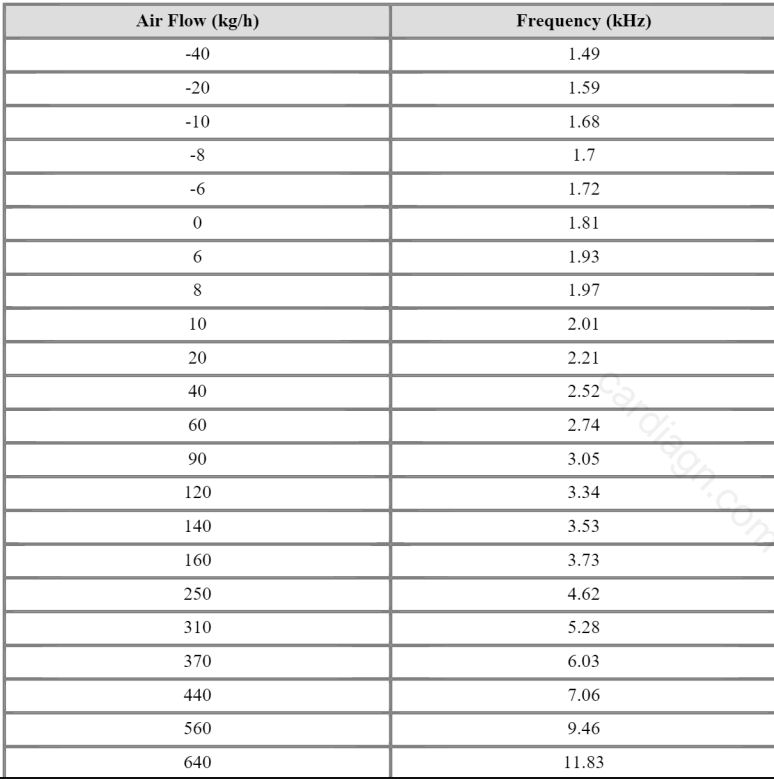
Specification (MAFS Mass Air Flow Sensor)
MAFS Mass Air Flow Sensor Circuit Diagram
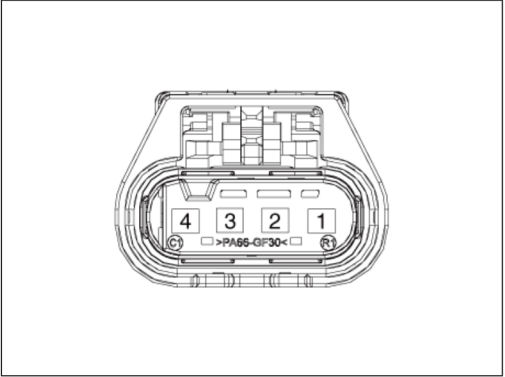
Harness Connector ( MAFS Mass Air Flow Sensor )
MAFS Mass Air Flow Sensor Inspection
- Check the MAFS visually
– Mounting directions correct?
– Any contamination, corrosion or damage on connector?
– Air cleaners clogging or wet?
– MAFS cylinder’s deforming or blocking by any foreign material? - Check any leakage on intake system and intercooler system.
MAFS Mass Air Flow Sensor Removal
- Turn the ignition switch off and disconnect the battery ( – ) cable.
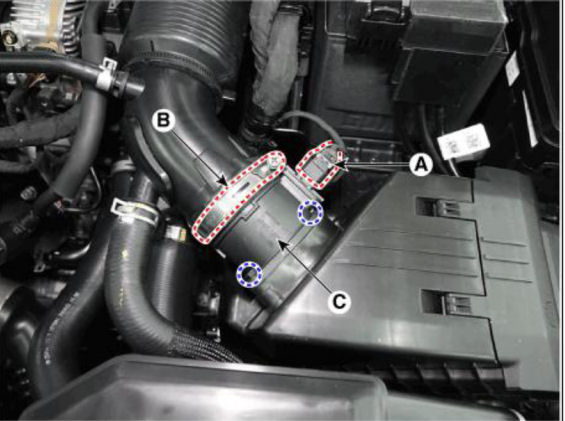
- Disconnect the mass air flow sensor connector ( A ) and the installation clamp ( B ).
- Remove the mass air flow sensor ( C ) after loosening mounting bolt.
Tightening Torque
9.8 – 11.8 N.m (1.0 – 1.2kgf.m, 7.2 – 8.7 lb.ft)
MAFS Mass Air Flow Sensor Installation
- Install the component with the specified torques.
- Note that internal damage may occur when the component is dropped. In this cade, use it after inspecting.
- Be carful not to damage or deformation the sensing element and front grid.
- Insert the sensor in the installation hole and be carful not to damage when installation.

